


http://www.onlinedjschool.com/
Lesson 1
Introduction To Basic Mixing
Mixing in DJ terms means the blending of songs or sounds to create a transition or remix of songs or sounds for playing to a crowd, mixtape, remix or recording. It is the most simplest and common way that most every DJ uses to play music in a club, party, or event. Creating that perfect mix of two songs takes using your senses of Sight, Touch, and Sound. When you have control of these senses, you will be able to easily control your DJ equipment to playback the songs you are trying to mix in an effortless way. DJ Mixers, turntables, CD players, MP3 players all are tools of the trade that you have available to you to be a quality DJ.
Mixing is pretty basic, it involves the following steps using two audio sources and a DJ mixer:
* The first song is played from the first source into the DJ mixer, this song is heard coming out of the mixers outputs
* The second song playing from the second audio source is cued up inside the DJ mixer and the two songs tempos are matched using the pitch control,
* At the right break in the first song, the second song is blended into the first,
* After the 2 songs play blended for a certain amount of time, the first song is faded out and the
second song is now playing by itself,
* The cycle keeps repeating itself to create a long non stop mix of songs.
Mixing is the same as day and night, dawn and dusk are the transitions between them.
Now that you have a general idea of the basic steps in mixing, you should do a little practicing on the following before you start trying to mix.
Sight, Touch, Sound- Using your basic senses to master your equipment.
Sight
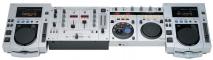
Before you are able to mix you need to know the basic setup of your equipment. In the diagram below we use the general setup of some basic equipment. You can see that each turntable is connected to the phono inputs of the DJ mixer. Turntable 1 is connected to Phono input 1 and Turntable 2 is connected to Phono input 2. If you were using CD players, the only difference you would make is to connect the CD players to Line inputs instead of Phono inputs. Each input has its own level of power so a turntable signal would not be able to sound right in the Line input and the same as a CD player into a Phono input.
Touch
Now you have to find out which hands feel most comfortable controlling each piece of your equipment. It will all depend on how you actually setup your equipment. Most of the time you will see a DJ mixer in the middle of 2 turntables or CD players but whatever works for you is what you should use. See what hand you are most comfortable with controlling the DJ mixer and what hand you are most comfortable with controlling you turntable or CD player.
Sound
When purchasing your headphones, find a pair that feels right on your ears. Do not buy a pair just because it is branded as DJ headphones. Some of the best headphones are not made to DJ with. Once you have your headphones, practice listening to music through them from your equipment. Find out what ear you feel most comfortable with monitoring what is playing inside the mixer and what ear you feel comfortable with monitoring the live mix playing from the outside speakers. If you have ever watched a DJ live you will see that they use 1 ear to listen the headphones and 1 ear to listen to the outside mix.
Basic DJ setup of 2 turntables and a mixer.
Format/Media Pros & Cons -
Depending on the type of DJ you are, you will want to make a decision on what type of format/media you are going to DJ with. Cost, portability, endurance, and availability of DJ equipment are all issues you will need to decide on when building or adding to your collection. So the type of music format/media you decide on will help you make the choice easier.
Here are some available formats/media choices along with their pros and cons:
Format Pros Cons
Vinyl
Easy to do tricks (scratch, pitch) Sometimes hard to find
Hands on mixing Sound quality loss after time
Holds better value for resale or trade. Heavy to travel with
Damages easy
Expensive to make
CD
Easy to find Not as easy to manipulate
Can make your own tracks to play CDs cost more to buy
No data loss or long term wear and tear MP3 download quality is low
Hard disk
Cheap to store on a hard drive Can lose all data quickly
Can make your own tracks to play Needs to be backed up
Easy to travel with Expensive hardware/software
You might want to also check out to see what type of equipment and format/media your favorite DJs are using and then make your decision. To spend thousands of dollars buying records and turntables and then transferring them to CDs and then buying CD players is a big expense and very time consuming. Choose wisely.
lesson 2
Song Structure
Songs that DJs mix are usually patterned in a standard format that makes them easier to mix than the average song. Since most DJs are mixing for the main purpose of creating a non-stop dance mix (hip-hop or club music), we will give you a general idea of the patterns and breaks of the songs.
Depending on the type of music, songs have an intro anywhere between 8-24 bars. To understand music bars you should remember this count off:
one, two, three, ONE, one, two, three, TWO,
one, two, three, THREE, one, two, three, FOUR,
and so on.
Its basically the kick drum and the snare that represent the one, two, three, four counts. You can also try to use your body and see the way the beat makes you move and that will sort of help you catch the beat. You will learn more of this in the BPM Basic Lesson.
Look at the diagram below to see the basic song structure and the parts of a song. The usual parts most DJs try to mix are GREEN. These are called intro, outro, break/chorus. These parts usually do not have vocals or are actually designed by the producer for you to be able to mix into or out of. The parts you would usually just let play are colored in BLUE. You would not want to mix over a verse with another song because it would usually create a chaotic blend of noise that would not sound very good. There are times where this is an exception but that will be studied later on in the Intermediate lessons.
Typical Song Pattern
lesson3
Transitions & Fades
Once you have an understanding of Song Structures, you need to understand how to combine the parts you would mix with a simple transition or fade.
Look at the example below to visually see the steps you might take when creating a transition or fade while mixing.
Steps taken for diagram below
1. While Track 1 is playing, cue up the song (Track 2) you are going to mix into the song (Track 1) already playing.
2. Start playing the song (Track 2) you are going to mix into the first songs (Track 1) break/chorus. Start with a gradual fade in.
3. Around this time, both songs should be playing together and in sync.
4. You may now begin to use a gradual fade out on the first song (Track 1) . Make the fade complete and you should no longer hear Track 1. Track 2 should be the only one you hear now.
Basic Types Of Fades
There are 2 basic types of fades/transitions you will need to learn first. The easy/gradual fade or the hard/quick fade. Each is used in different mixing situations.
First is the gradual fade (diagram1) in and out. Look at the first diagram and see how the black line which represents the signal level of audio and how you would adjust it accordingly with your mixers crossfader.
It first starts with a low volume and proceeds to rise until it is at the same level as the track you are mixing into. Then you start to complete the crossfade by lowering the audio of the first track. Once you bring the crossfader all the way across, you have completed the fade. Notice how the two signals play together for a period of time in the Crossfade Zone (highlighted in gray), this is Mixing.
-
19-05-08, 11:57 #1


- Join Date
- Jan 2007
- Location
- Di bawah langit Diatas tanah Gading serpong
- Posts
- 346
- Points
- 415.40
Thanks: 1 / 2 / 2 Online Dj School
Last edited by awi; 22-05-08 at 14:00.
Vitamin is Not Everything
BuT
TriPPinG Withouth Vitamin is NoThinG
TriPPinG Till u Drop
-
19-05-08, 14:22 #2


- Join Date
- Feb 2008
- Location
- Bintan Island Indonesia
- Posts
- 1,790
- Points
- 2,194.10
Thanks: 0 / 1 / 1
Bro ini online dj school ya. Originally Posted by awi

-
19-05-08, 14:23 #3
- Join Date
- Jan 2007
- Location
- Di bawah langit Diatas tanah Gading serpong
- Posts
- 346
- Points
- 415.40
Thanks: 1 / 2 / 2
yup coba aja liat Originally Posted by D_JAY
Vitamin is Not Everything
BuT
TriPPinG Withouth Vitamin is NoThinG
TriPPinG Till u Drop
-
22-05-08, 13:58 #4
- Join Date
- Jan 2007
- Location
- Di bawah langit Diatas tanah Gading serpong
- Posts
- 346
- Points
- 415.40
Thanks: 1 / 2 / 2
Lesson 4
BPM Basics
Overview
Now you are ready to learn the skill of counting BPMs (Beats Per Minute). The BPMs can help you figure out what songs you might want to mix together or what songs are suitable for something specific such as a mixtape or a line-up.
Instructions
The best way to quickly count BPMs is to play a song and count the beats for 30 seconds and then multiply by 2. Sounds easy but you need to know what to count. Below is a diagram of a 1 bar beat, it shows the kick, snare, kick, snare, pattern. This is a simple diagram of the parts of a beat. Your job is to count each part for 30 seconds. You may want to use a stopwatch or a clock with a seconds hand.
Usually you are counting:
1, 2, 3, 4 (thats bar #1)
5, 6, 7, 8 (the bar #2)
9, 10, 11, 12 (bar #3) and so on.
If you counted up to 62 beats in a 30 second period, your BPMs would be 124 BPMs for that song.
You will be able to practice this by counting the BPMs for the tracks on the CDs for this program or by listening to your favorite songs to see what BPM they might be. Remember that as long as you are in the right ballpark of counting the BPM's, you should be ok. Even if you use a store bought BPM counter, sometimes it can be different from what you might count on your own.
lesson 5
Count-Off Lesson
Overview
With this lesson, you will be practicing "Mixing Enhancement" skills. The objective is to use both CD Players/Turntables to complete the sequence of numbers being played from CD1 & CD2.
Listen to the example to get a better understanding of what your mixes should sound like.
Instructions
Numbers 1 & 3 will play from "Track 2" on CD1 and numbers 2 & 4 will play from "Track 2" on CD2. Your goal is to mix the two tracks together to make a complete number cadence saying "1-2-3-4". Your mix should be on beat for the numbers to sound right. Good luck.
Vitamin is Not Everything
BuT
TriPPinG Withouth Vitamin is NoThinG
TriPPinG Till u Drop
-
22-05-08, 14:07 #5

- Join Date
- Nov 2006
- Location
- Nibanna
- Posts
- 282
- Points
- 366.40
Thanks: 0 / 0 / 0
idenya bagus


Share This Thread